 info@longreelighting.com


Description
Enhance your interior with the elegant silhouette of this 9-Light Goose Arm Opal Glass Bubble Tiered Chandelier. Designed with gracefully curved goose arm branches and soft opal glass globes, this chandelier creates a perfect balance of modern sophistication and timeless charm.
The layered bubble arrangement delivers a beautifully balanced lighting effect, while the warm brass finish adds a luxurious touch to the overall design. Each opal glass shade provides a soft, diffused glow, creating an inviting atmosphere for dining rooms, living spaces, bedrooms, and entryways.
With its sculptural form and refined details, this statement chandelier blends seamlessly with contemporary, mid-century modern, and elegant interior styles. It is designed to become a stunning centerpiece that elevates any room with artistic appeal and functional illumination.
| Material | Metal + Glass |
| Finish | Brass Finish |
| Voltage |
110-120V (US) |
| Shade Material |
Glass |
| Bulb Base |
G9 |
| Number of Bulb |
9 |
| Wattage Per Bulb |
25W |
| Fixture Size |
W31.9 in (81 cm) * H14.6 in (37 cm) |
Customer Reviews
Installation Videos


Installation are pretty easy and here are instruction videos and pics
PLEASE NOTE: Each blown glass is a one-of-a-kind, unique, hand-blown glass to be built by hand. As with all art, there will be slight variations including length due the natural characteristics of hand blown glass. Also the size of the finished unit is greatly affected by how each blown glass is tied to the metal frame. The layer and density are the main criteria which make the variation in size.
Although everyone has their own installation methods, we recommend starting from the bottom and securing the glass tubes to the "central frame cage". When you reach the middle part of the chandelier, it's important for the glass tubes to stand upright and spread outwards rather than sag. The following tips in the pic and video below illustrate how to keep the glass tubes upright or point out.
For more details on installation, including glass lengths, color arrangement, and other common questions, please refer to this our blog post.
While if you try to tie the glass pieces to the rings above the level where the glass pieces should located, the glass stems would sag. The following pic and video show that this method will result in the glass stems sag.
The below are some videos demonstrating the process of installing the blown glass chandelier:
For more details on installation, including glass lengths, color arrangement, and other common questions, please refer to this our blog post.
How To Customise Yours
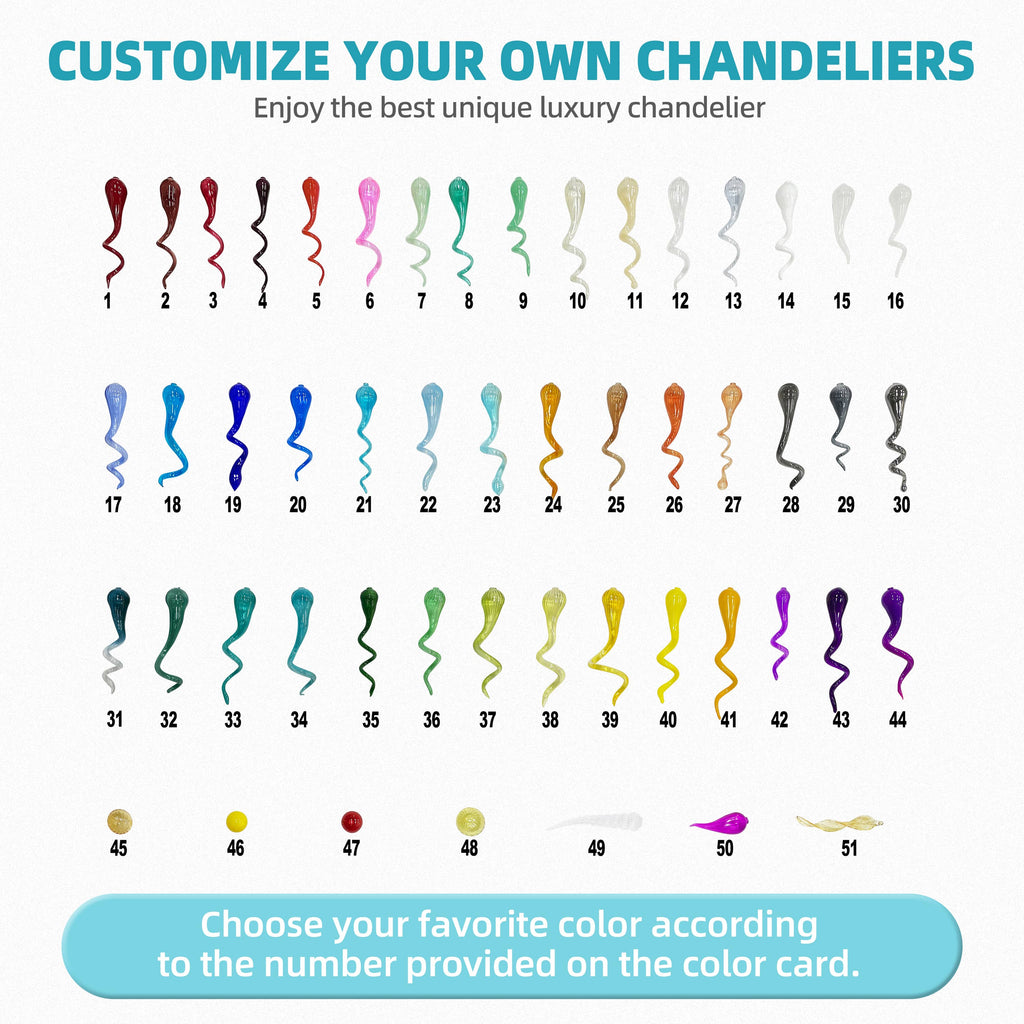
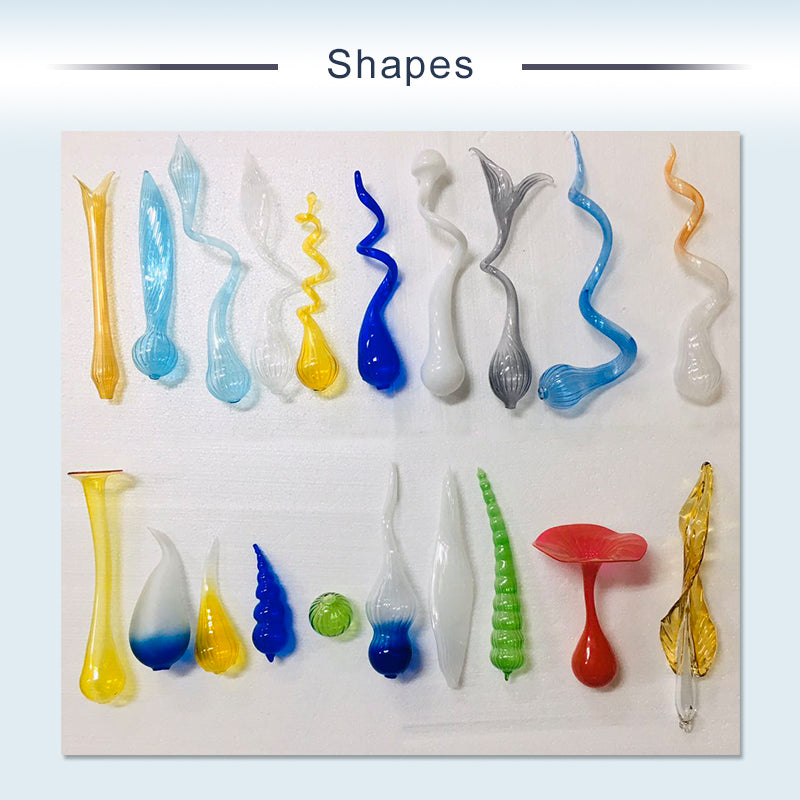
Customization Process
With years of experience as blown glass chandelier supplier that creates custom hand blown glass chandeliers, we have streamlined our process for our customers. Here we will walk you through our simple 4 steps to creating a unique and personalized chandelier just for you!
1. Please get in touch with us and let us know which model from our website has caught your interest. Alternatively, you can share your own picture with us to inquire whether we can create a similar item.
2. During the consultation, you will discuss the style, size, shape, color, and other details that you want for your chandelier such as chain length,canopy and so on.
Colors Choices
Shapes Of Blown Glass